I’ve been busy the last couple weeks prepping for a vendor sale at a local dog groomers (Helga’s Pet Grooming Plus is celebrating its 30th anniversary this Sunday, April 14, at its location at 7870 Culebra Road, San Antonio)
I wanted to make sure that I had some doggie-related items for sale, as well as our signature blankets and aprons from She & Me Designs (the Etsy store my daughter-in-law Stacy and I have). So, I got started on some table-fillers, such as key rings with doggie pics, coasters with doggie pics, aprons with doggie pics, AND fleece doggie beds.


I thought I’d share a few quick pictures and some ideas about how to make them – super easy to do, and your doggie will love them! And, best yet, you can make them in any size so perfect for the littlest and biggest dogs!!
I started with one yard of doggie-inspired paw-print fleece fabric; measuring 58″ wide x 36″ long.
I cut along the fold, so the sewing size is 29″ x 36″. The doggie pillow can either be sewed in either a rectangle or oval shape. I wanted the pillows to have the tied-knot finish around the entire edge, so I sewed about 5″ inside the edge ALL the way around EXCEPT for a 6-8″ gap along one long edge. I double-stitched the seam in order to make sure it would hold up to doggie-pawing all over it!
Now, in order to keep the stuffing from falling out, I sewed a 6-8″ piece of Velcro in the gap. I actually tried it several ways; neither of which was ‘simple’, but the end result was great.
- The first pillow I made, I sewed the Velcro in AFTER I sewed the seam all the way around. This was kind of tricky because I only had a small gap to work in, and to get the sewing machine foot to fit in the gap. BE CAREFUL not to sew the top and bottom of the VELCRO in together 🙂
- The second pillow I made, I sewed the Velcro in BEFORE I sewed the seam! A little trickier because the two pieces of fabric were loose and I had to make sure they were sewed in precisely so that the two pieces of Velcro lined up. After they were sewed though it was much better, because then sewing the seam around was very easy!
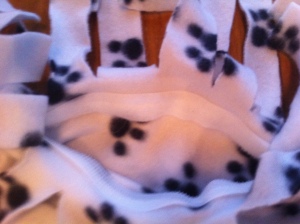
Velcro opening
After the Velcro is in and the seams are sewed, then it’s time to cut the 1″ strips around the doggie bed. I’m including a link to a tutorial in case you haven’t made a tied-knot quilt (or doggie bed) before.
- If you make a rectangular bed, then you’ll probably need to cut a 5″ square out of each corner, and then cut the strips.
- If you make an oval bed, then you’ll cut strips all the way around, but you’ll need to do some creative cutting around the corners. In order to ‘make the corner’ you’ll need to cut the strips wider at the bottom and narrower at the top. Be careful, but it does work.

Hand-cut 1″ knotted ties
Note – be sure you don’t tie the knots in front of the Velcro until you’ve stuffed the pillow!
I am fortunate because I have an electric scissors that I used to cut all the strips. It is a My-T-Fine cordless scissors (available at JoAnn’s Fabrics), and I must say, it works my-t-fine for cutting fleece and most everything else!!!
After all that is said and done, it’s time to stuff the pillow. I used Poly-Fil, which is available at all fabric / craft stores, as well as Wal-Mart and probably dozens of other stores as well! However, you could also use cedar chips, as well as plastic bags (my daughter-in-law’s suggestion)! Because of the Velcro opening you can replace the stuffing whenever necessary!
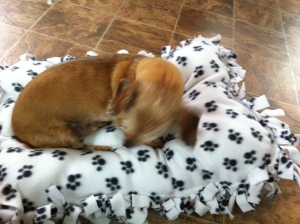
So, that’s how I made the doggie pillows! They turned out great, and Boris (our wonder dog!) sure loves them too!


That’s how I’ve spent my last couple of weeks – making doggie stuff – and I’ve had a good time at it too!!! So, how have you spent your time lately? Anything fun?
Have a great, great week,
Linda


