Archives

A Novice’s Attempt at Reupholstering!!

I’ve always thought that I’d like to do some reupholstering, but hadn’t ever tried it.

I started with what I thought would be an easy project – a side chair. Our daughter-in-law was getting rid of a chair that she no longer had any use for – and donated it to our daughter. Unfortunately the yellow floral fabric wasn’t to her taste. We decided that the chair would be the first reupholstering attempt. Off to JoAnn’s Fabric we went, where she found fabric she really liked, and she was thrilled that it was half-off!!!

Here’s the chair BEFORE I tore it apart – as you can see, it’s a perfectly good chair and in great condition!

Free chair!

Pretty, isn’t it?   Personally I like the yellow floral.

I took about a hundred pictures during the process, but don’t worry, I won’t post them all – just enough for you to get the picture of how the process went.  I was amazed at how many staples had been used – by the time I’d finished taking everything apart I’d removed more than 200 staples!!

We were surprised to find when we turned the chair over, that the ‘lining’ underneath had a zippered compartment!   It was probably there to make it easier to tighten the chair legs, but we thought it made a nifty hidden compartment!

Although I separated the back from the seat,  we were at a definite disadvantage because the original upholstery was put on BEFORE the legs were attached.  Since I wasn’t about to remove the legs from the structure, we had to improvise along the way.

Here’s a few pictures of how everything was taken apart –

Hidden zippered compartment

Hidden zippered compartment

Pulling staples!

Pulling staples!

Removing screws

Removing screws

Removing all the upholstery layers

Removing all the upholstery layers

Separating back from seat

Separating back from seat

Chair back

Chair back

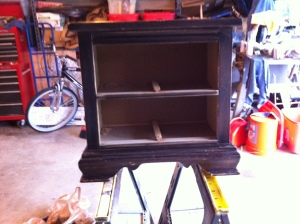
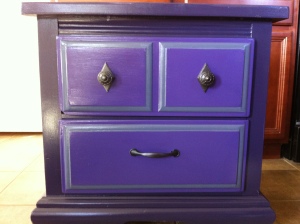
Before we started reupholstering, I painted the chair legs gray, to match the gray in an end table we had painted for Megan several months ago.   (See previous blog titled “Refinishing a Thrift Store Table”. )

After I removed all the upholstery, I marked the pieces before I took them all apart. Although I was able to use the existing back pieces for a pattern , I was not able to use the pieces from the chair seat because it ripped while I was removing it.  You’ll see in the next pictures that instead of a fitted chair cover we  just ‘wrapped’ it and stapled it on.

"Wrapping" the chair seat

“Wrapping” the chair seat

Trying to 'tuck' fabric down around the legs

Trying to ‘tuck’ fabric down around the legs

Seat covered

Seat covered

Chair back covered

Chair back covered

Zippered compartment put back on

Zippered compartment put back on

FINISHED!!!

FINISHED!!!

Megan approves!

Megan approves!

I’m very happy with the way it turned out, but………I must say it was difficult!  I’m not sure that I’ll try anything more upholstered than an side chair in the future.  It was fun doing it with Megan though – we made a pretty good team!

I’d love to hear about your first time reupholstering projects!   Did they turn out as you expected?  And did you enjoy it enough to keep doing it?    Your comments are welcome and appreciated! Have a great week – Linda

Refinishing a Thrift Store Table

Over the last 30+ years or so I’ve refinished a table here and there, but haven’t ever bothered to learn all the intricacies of refinishing furniture properly. I’ve always thought it was something I’d like to do a lot of, maybe even do it on a consignment basis. BUT, after working on a small project over the last couple weeks I learned (1) that it’s very fullfilling, but (2) I’m not really very good at it!

My daughter is moving into an apartment, and of course as all moms do, I tried to think of anything I could do to help her out. Buying old furniture and redoing it seemed like a great idea. The old light bulb was just clicking away at the possibilities!

She and I have very different tastes – I like mission style furniture (simple lines), and she tends to like ‘old world’ looking furniture. We found a perfect ‘first piece’ at the Community Thrift Shop in San Antonio – a pretty-beat-up end table or bedside table. Heavy dark wood with an ‘old world’ look to it. The piece was priced to sell at about $11.50 with a senior discount!

Thrift Store end tableBack of cabinet

So far so good! We got the piece, now for the supplies!Daughter chose her colors. She is by no means a traditionalist when it comes to color!  She loves color so she chose three colors for the small chest of drawers. A dark purple (Glidden ‘Black Tulip’) for the table top and sides, a lighter purple (Glidden “Fresh Grape Juice’) for the drawer fronts, and dark gray (Glidden ‘Stormy Night’) for the accent around each drawer.

I started with what seemed like a heavy sanding, using husband’s power sander. I had to change out the sand paper several times, but seemed like I really got it smooth.

IMG_4806 IMG_4813 IMG_4804

After wiping off the dust, I primed it with Glidden white primer, waited for it to dry, and then started on the base coat. It took three coats to get a good finish on it.

with the primer

with the primer

Base coat (dark purple)

Base coat (dark purple)

As soon as I got all that finished I started on the drawers. I painted those the lighter purple, three coats each. Although I didn’t avoid the inset accent area, I did try to keep as much paint off it as possible After the drawers dried completely (more than 24 hours) – I taped off around the accent area in order to paint that dark gray

.IMG_4941

I know that television ads show the painting tape coming off perfectly – no paint leakage underneath, no marks, etc. Well, not so much for me! So, I took a little extra time with a fine-tipped brush and some paint and cleaned up the edges.

I let the entire table dry another full day before I applied three coats of Min-Wax over the entire painted area, letting it dry well between each coat. I also used some steel wool to smooth out bumps inbetween coats.

Next, we went to Hobby Lobby and purchased a handle and two knobs for the little chest of drawers. Hobby Lobby has a great selection of unusual and unique hardware, so it was fun to peruse for awhile. And, it’s always 50% off!.  And yes, we noticed after we put the hardware in that it looks suspiciously like a happy face!  A really cute one!

Hobby Lobby Hardware

Hobby Lobby Hardware

All in all the project went well, but there are definitely some things I will do differently next time –

Gouges in wood  1.  I’ll take a lot more time in the preparation stage, sanding splintery edges, etc. I’ll also try to fill in with wood glue any gouges in the MinWax coverage wood. I really thought the sanding I did was sufficient, but as you’ll see from my pictures, I should have prepped more!  (See picture at right.)

2.  I’ll take a lot more care with the clear finish coat. I noticed after the third coat that there was a build up around the edges of the table. I’ll need to research how to spread it evenly – if you have any suggestions I’d really appreciate it? Do you use special brushes? How do you keep it from streaking?  (See picture at left.)

Here’s the finished project – our daughter loves it, and I enjoyed making it for her!

FINISHED!!

FINISHED!!

T.V. Tray to Upholstered Pressing Table

So, how many of you are quilters who are tired of twisting around every 10 seconds, scooting to the ironing board and back again, just to iron a little seam so you can move on!

Me TOO!!!!!!!!!!!!!!!!

I was researching Pinterest the other day (okay, checking out all the cool stuff hour after hour!) and found a great tutorial posted by Elizabeth Hartman at Oh, Fransonn!.   She explained, in detail, how to convert a small folding wooden t.v. tray into a padded pressing table.

I followed the instructions included in Oh, Fransonn’s post, and YAHOO, I have a great little table that sits beside my chair!  No more twisting around and scooting back and forth to the big ironing board!  My cutting mat on one side, my little pressing table on the other, and I’m ready (and no excuses 🙂 )

Oh, Fransonn’s instructions were so clear that there’s no need for me to duplicate, but here are a few pictures of my little project.  You’ll notice that mine isn’t quite as neat underneath because I didn’t take the time to cut my fabric to size first (I should have though!).  However, even so, from the top it looks pretty good, and it works great!


But, regardless of how it looks from underneath, on top it’s perfect!!

Sorry about the mess – I’m working on a queen size scrappy quilt, and I tend to keep all the scraps out and about while I’m working.  It works for me at the time, and feels great when it’s all cleaned up!!

I’d love to hear about your projects!   Your comments and suggestions are always welcome!

Have a great week,

Linda

P.S. – I found my oak-stained TV Tray at Walmart for less than $9.00.  They also had the walnut stained table for the same price.