My daughter loves to give treats to her co-workers for the holidays, and this time she asked if I’d make her some Halloween candy bags made out of some cute Halloween fabric. I love a challenge, so thought I’d give it a try.
She had mentioned that she would be putting candy corn and other treats in the bags, so the bags needed to be plastic lined. I wasn’t anxious to spend too much time on the bags, so came up with a ‘quick’ solution.
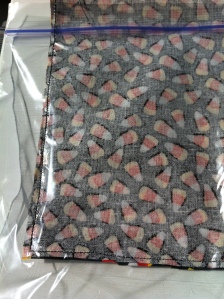
Luckily when I found this adorable Candy Corn fabric at Hancock Fabrics I knew it would be perfect! I purchased 1/4 yard, because her original request of three baggies grew to eight! I had just enough fabric to make eight 5×5 baggies!
 Isn’t this fabric adorable???
First I cut two strips 6″ wide, then cut the strips into 5-1/2″ pieces. Each strip gave me four ‘baggies’.
With the fabric ‘right sides together’, I placed a Ziploc sandwich bag on top of the fabric, placing it about 1″ down on the fabric and matching up one side. The baggie is much bigger than the baggie, so there is surplus plastic hanging over. I lengthened my stitch some (2.0 on my BabyLock) – a tight stitch will cut the plastic. Then, I sewed a 1/4″ seam all around the baggie from one side around to the top of the other (all the way to the top – not just to top of the baggie!). Sewing on the plastic is a little tricky so take it slow.

I cut off the excess plastic, and trimmed around the corners to eliminate bulk. Then turn the bags right side out – the baggies will now be inside the fabric!!

Now the tricky part for me – finishing the top edge! The finished baggie is small (5 x 5) and there’s not much room for fingers! Turn over the top edge of the fabric so that it covers the top edge of the Ziploc bag (about 1/2″) but not the actual zipper part. Place the baggie under your needle and carefully stitch the fabric. Make sure that you don’t stitch over the zipper or it won’t close!
Once you have that done, make sure that the zipper actually closes. Some reasons why it might not;
- maybe you stitched over the zipper and the threads are stopping the closure, or
- you sewed crooked and the zipper is ‘cock-eyed’,
If it doesn’t close you will probably need to do some ripping in order to free up or straighten the Ziploc zipper. After that’s done, the baggie is finished and ready to fill up! The best part is that it’s reusable (if you are lucky enough to get the back).
I think they turned out pretty cute, but I will have to admit to a few moments of frustration!! The plastic baggies did tend to slide around, making some of the seams less than pretty. I can’t say that I’d want to make these baggies for every holiday, but it was fun to give it a try.

I should mention that I did not look for any tutorials ahead of time to see if there was a better / faster / smarter way of making these baggies – in hindsight it might have been a good idea to have done that 🙂
Hope you are having a great day!
Linda


