Lamp Shade DIY and Queen Pillowcases – Guest Room’s Ready!

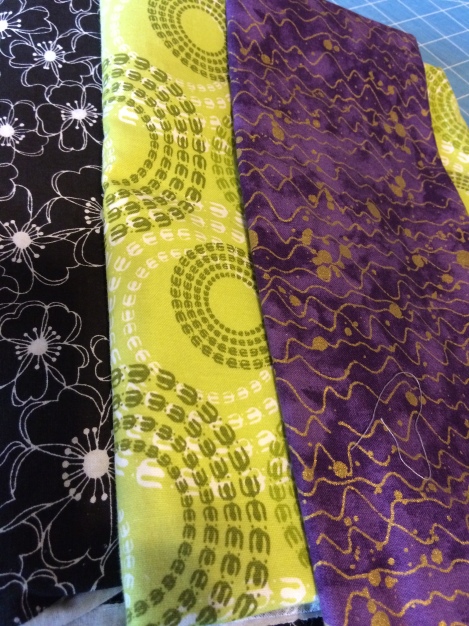
I decided when we moved in that I wanted to design the guest room around an existing comforter we already had.  It’s a black background with silvery-gray design throughout.  For color-splashes I chose citrus green and grape.

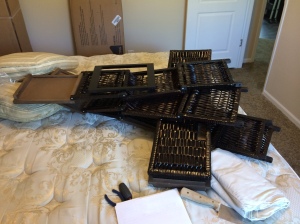
I started the room by putting together two bedside tables that will also serve as small dressers.  I generally depend on my husband for these projects, but he’s so busy on outdoor stuff that I decided to give it a go myself.  It took about three hours, but I did it.


IMG_0093

IMG_0094


I purchased two lamp bases, and two plain off-white lamp shades.

IMG_0270

I wanted dress up the shades with some fabrics using the black, green and purple motif.

IMG_0271


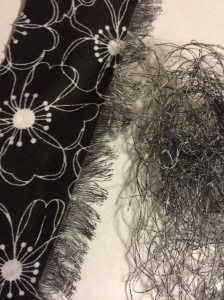
Here’s how I trimmed them out:  For the first layer, I cut a 2-inch wide of the black/white fabric. Using a seam ripper, I picked away at the threads until I had about 1/2″ of frayed threads across the top edge.

IMG_0252

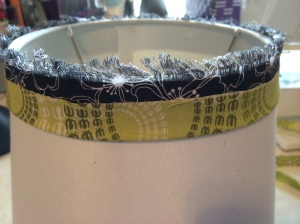
Before I attached the fabric to the shade, I folded over 1/2″ on the bottom edge and ironed in order to have a clean edge showing.  I then hot-glued the frayed fabric around the top edge, with the frayed part up above the shade edge.

IMG_0272IMG_0273


The next layer was the citrus green.  I cut it 1-1/2″ wide, folded in half and ironed it smooth.  I hot-glued that along the bottom edge of the black fabric; the raw edge is in the center.

IMG_0274

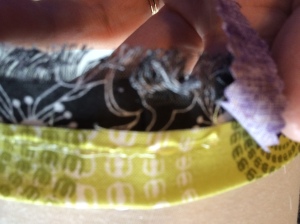
The last layer, the purple, was cut 3/4″ wide; I folded in half and ironed, and then I used a pinking shears and cut the raw edges so that it ended up about 1/2″ wide when flattened out.  It was sort of hard to pink in a straight line so I had to fix a few areas, but it turned out pretty good.  If you don’t have a pinking shears, you could just cut in a wobbly line down the edge in order to give it interest!

IMG_0275IMG_0276


So, here’s how the lamp shades turned out!

lamp shade


I also made two queen pillowcases using the same fabrics as the lamp shades!  I’ve made these before and blogged about them here, so I won’t go through that again!  Have you ever made your own pillowcases?   I love having being able to make unique pillowcases to brighten up a room!   Here is the finished product!

IMG_0316IMG_0319


IMG_0283

Although the room isn’t quite finished, it’s definitely ready for company.  I have a headboard that I got off Craigslist that I need to refinish, but that’s a project for another day (week, month).  I hope you’ll come back to see it finished!

I hope you come visit All Around the Mulberry Bush again!   Have a great week –


Linda


Crape Myrtle Trees – Front Yard Landscape

We were finally able to start our front yard landscaping project this weekend.  Our daughter came out, spent the night, and declared she wanted to be put to work!  Well, who can say no to that!!!!  Okay, then, we got to work!

Home Depot had Crape Myrtle trees on sale (regular $74, sale $49!!!  – whoa, great deal!!), so we bought three.  Two trees with white flowers, one with pink!  Here’s a picture of a full-grown pink Crape Myrtle – isn’t it beautiful??

Image

The trees are only about 6′ tall – which is good because they were still heavy!.

We measured across the yard and tried to make sure they would be evenly placed, and then Megan dug three huge holes.  We dumped a bag of Miracle Grow soil in each, watered them good, and low and behold, we have landscaping!!!   The trees have softened up the yard already, adding some much needed green.

Image

The fence will be in soon, and we’ll start adding bushes around the perimeter for more color!  I’ll keep you posted on our progress!  I’d love your comments about what you would do to your hardscape if you had the chance to start from scratch!

Have a great day!

Linda


Xeriscaping our Barren Front Yard

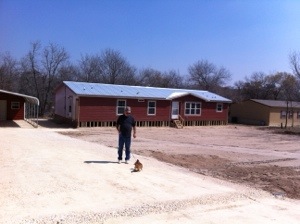
We moved to Texas several years ago, and have been living in an RV most of that time. We decided last Fall that it was time to get permanently settled, so after some looking around we purchased a Palm Harbor mobile home – 3 bedrooms, 2 baths, 2000 sf. Bigger than any home we’ve ever owned. And, we’re putting it on 2 acres of nearly undeveloped land.

The acreage already had a septic tank, and access to electricity and water. However, it had trees ALL over it; scraggly, brushy trees. When the mobile home installers went in to clear the site, they literally pushed two dozen trees out of the ground and moved them all further back in order to make space for the home.

Over the last six weeks or so, my husband and son have been out busy with the chain saws. Although I’ve helped some with brush clearing, my real work will be coming up soon.

As soon as we get the keys, I’ll be starting on the front yard. I plan to Xeriscape the front yard, using drought-tolerant and native plants and trees to keep the use of water down as much as possible.  I had a whole plan, and three individual zones designed.  Due to a reduced budget I won’t be able to do as much decorative landscaping as I’d hoped, but it will still be pretty!

20140401-073659.jpg

HGTV Desperate Landscapes, where are you?????    We need you desperately!!!!   This yard is huge!!!!   70′ x 90′ – a huge blank canvas!

20140323-201307.jpg


I’ve asked my daughter-in-law to help me with this huge project. She has a nearly unlimited amount of creative ideas that always mind-boggle me! I’m going to love working on it with her.   And although I won’t be able to create the Xeriscape oasis I had hoped for, I know that it will be beautiful when we finish.

My first chore will be digging and constructing the sidewalk from the deck to the driveway. Thankfully this will be ‘relatively’ easy because our base dirt is mostly sand – easy digging!  We are going to decorate the sidewalk with some stepping stones made especially by the grandkids!

I’ll be talking to Master Gardeners here in San Antonio, because I don’t know anything about drought-resistant plants, and I’ll also visit the Botanical Gardens because they are a huge source of landscaping information!

I can’t wait to get started!!!!

Have you ever Xeriscaped a yard? What recommendations do you have for me? I’d sure love any advice you have to offer!

Have a wonderful day!

Linda

Sharing my Love of Sewing!

Several years ago we moved from Oregon to Texas to be near our grandkids – we wanted to be year-round grandparents, rather than just holiday and vacation grandparents; what a blessing it has been!

A side benefit is we get to teach them things that we’ve learned and enjoyed. One of those things is my love of sewing. Our granddaughter, now 6, has been enamored with my sewing machine since she first saw it. Over the last year she’s been able to sit with me and ‘sew’ things – stretching to put her foot on the pedal and still guide the fabric with her little fingers. It’s been a joy to watch her – I can see already how much she loves all the fabric colors and textures, and know she’s just itching to get busy!

When we were Christmas shopping, I knew that I wanted to get her a small sewing machine. I didn’t want a ‘real’ machine, because it would be too heavy, and would have too many bells and whistles for her. And, I didn’t want a cheap toy machine because it’s just too frustrating when it doesn’t really sew anything.

We found a Singer Pixie Plus machine that is lightweight, but still has a sturdiness to it that looked like it could withstand some wear and tear. It also has eight different stitches to lend some variety to her sewing.

Singer Pixie Plus

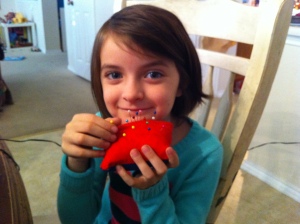
She’s had the machine since Christmas, and has used it some, but this week she decided it was time to work on a project. We decided on the ever-important pincushion!! I figured, with four straight edges, it was something that would be easy to show her how to make turns, sew a straight line, stuff with poly-fill, and then sew it closed.

She tried really hard, but a few times she ran off the edge – thank goodness for seam rippers. She took it all in though, and didn’t get frustrated. I think her very first project turned out perfectly  – I’m so proud of her, and can’t wait until she’s ready to take over the She and Me Designs sewing and quilting business 🙂

IMG_6229IMG_6234IMG_6236

IMG_6238IMG_6243

IMG_6246IMG_6250IMG_6251

The sewing machine is perfect for her.  She’s able to reach the small pedal, and the machine is light enough that she can move it around on the table to where its comfortable.  I’m so happy that the machine sews well, because as all us sewers know, it’s incredibly frustrating when our machines are acting up!!!

Have you taught your daughter or granddaughter to sew?  What projects did you work on, and how did it go?  I’d love to hear your experiences, and some hints for some more projects.

Hope you are all having a wonderful January – if you are decorating for Valentines Day take a moment to hop on over to She and Me Designs to check out some sweet Hearts decorations.

All my best –

Linda


Halloween Candy Bags

My daughter loves to give treats to her co-workers for the holidays, and this time she asked if I’d make her some Halloween candy bags made out of some cute Halloween fabric.  I love a challenge, so thought I’d give it a try.

She had mentioned that she would be putting candy corn and other treats in the bags, so the bags needed to be plastic lined.  I wasn’t anxious to spend too much time on the bags, so came up with a ‘quick’ solution.

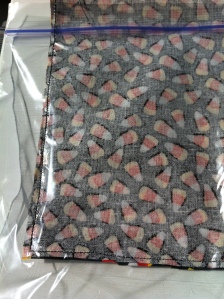
Luckily when I found this adorable Candy Corn fabric at Hancock Fabrics I knew it would be perfect!   I purchased 1/4 yard, because her original request of three baggies grew to eight! I had just enough fabric to make eight 5×5 baggies!

Candy Corn Fabric  Isn’t this fabric adorable???

First I cut two strips 6″ wide, then cut the strips into 5-1/2″ pieces. Each strip gave me four ‘baggies’.

With the fabric ‘right sides together’, I placed a Ziploc sandwich bag on top of the fabric, placing it about 1″ down on the fabric and matching up one side. The baggie is much bigger than the baggie, so there is surplus plastic hanging over. I lengthened my stitch some (2.0 on my BabyLock) – a tight stitch will cut the plastic. Then, I sewed a 1/4″ seam all around the baggie from one side around to the top of the other (all the way to the top – not just to top of the baggie!). Sewing on the plastic is a little tricky so take it slow.

Placing the baggieIMG_5913

I cut off the excess plastic, and trimmed around the corners to eliminate bulk. Then turn the bags right side out – the baggies will now be inside the fabric!!

IMG_5915

Now the tricky part for me – finishing the top edge! The finished baggie is small (5 x 5) and there’s not much room for fingers! Turn over the top edge of the fabric so that it covers the top edge of the Ziploc bag (about 1/2″) but not the actual zipper part.  Place the baggie under your needle and carefully stitch the fabric.  Make sure that you don’t stitch over the zipper or it won’t close!

Once you have that done, make sure that the zipper actually closes.  Some reasons why it might not;

  • maybe you stitched over the zipper and the threads are stopping the closure, or
  • you sewed crooked and the zipper is ‘cock-eyed’,

If it doesn’t close you will probably need to do some ripping in order to free up or straighten the Ziploc zipper.  After that’s done, the baggie is finished and ready to fill up!  The best part is that it’s reusable (if you are lucky enough to get the back).

I think they turned out pretty cute, but I will have to admit to a few moments of frustration!!   The plastic baggies did tend to slide around, making some of the seams less than pretty.  I can’t say that I’d want to make these baggies for every holiday, but it was fun to give it a  try.

Finished baggies

I should mention that I did not look for any tutorials ahead of time to see if there was a better / faster / smarter way of making these baggies – in hindsight it might have been a good idea to have done that 🙂

Hope you are having a great day!


Linda


She & Me Designs – Re-opening!!!!

Did you know that SHE & ME DESIGNS has re-opened on Etsy?  My daughter-in-law and I opened the store almost two years ago and we LOVE making aprons, quilts and pillows for kids and adults!!!!!!!!!!!

Here are just a few pictures of some of our special items –

Moda Squared Kids QuiltTrain QuiltLady's Quilted Apron

Want a custom quilt????  Special colors?  Special design?  Want a name added?  Just ask  –  we’ll be happy to work with you!

Independence Day – Thank you!!

Happy 4th of July everyone!

Every country has its traditions, and for the good old USA, it’s all about the 4th of July! Picnics with family and friends, sparklers and fireworks at night, it’s all about celebrating! Celebrating our freedom! And nothing says freedom to us like our flag!  Our beautiful red, white and blue flag!

american_flag-971804

Doesn’t she make you feel patriotic (and darn lucky)???  Does me!!

Being a quilter I decided to make my own version of the American Flag – 12 little mini-flags sewed up into one wall hanging!!  Very easy to do – each individual flag is paper-pieced on a sky-blue background using a variety of reds, whites, and blues and sewn into a 12-patch.  The flags are bordered with blue star fabric and has two matching fabric hangers.  The wall hanging has a place of honor all year long and reminds me every day to appreciate our lives and always be thankful for everything being a US Citizen guarantees us!

IMG_3634IMG_3637

Thank you so much to all the men and women, current and past (including my own brothers, husband, son and daughter-in-law) who have served our country in the Armed Services!  Our freedom came at a heavy price paid by so many.  I pray for the safety of those currently serving!

flag-soldiers

Happy 4th – stay safe!

Linda

Creating Sewing/Crafting Space in the RV

We are finally settled back into our RV and staying at a very nice RV park in San Antonio. It was a long move (mostly because I tend to start packing months ahead, so we are living in boxes ‘forever’!) but it’s done and over with!

When we moved into the rental a year ago I posted pictures of  the wonderful (and organized) sewing room.  That room was a wonderful sewing space!

I thought I’d update it with pictures of my new sewing ‘area’; a 6′ wide x 3′ deep corner in our RV. It’s where the recliners SHOULD be but for now the sewing has taken over.

IMG_5653

Thank you, God, for a very patient husband who puts up with all this sewing mess!   The fabric, the batting, the ribbons and laces, the patterns, the threads – it’s all on top of or under the table!  It’s not the ideal….but it works.

Thanks to this little sewing space, She & Me Designs (Stacy’s and my Etsy store) continues to post new quilts and aprons for sale!    The little girls pink rag quilt in the pictures will be posted there soon!

I hope this encourages you to sew or craft no matter what space limitations you have – it can be done – maybe not the way you would prefer but at least you’ll have the satisfaction of creating to your hearts content!!

Take care, and have a great day!!

Linda

Adventures with the Grandkids!

One of our many reasons for relocating to Texas (beyond just being close to our kids and grandkids) was to be available to take care of the grandkids for extended periods when our son and daughter-in-law wanted / needed some vacation time.

Even though we spend a lot of time with the grandkids, it’s usually just a couple hours here or there, and ‘entertaining’ isn’t really an issue. I’m not particularly creative at coming up with interesting things to do, so keeping them busy can be quite the challenge! Fortunately they are pretty creative on their own 🙂 and then we have to clean it up!!!

We decided this morning, after a hearty French Toast breakfast, to take a little trip over to our 5th wheel so we could pick up a few forgotten items, and take a walk around. The kids enjoy feeding the ducks (wish I’d gotten pictures), and just running around the lake area!

IMG_5626  IMG_5609

IMG_5611 IMG_5623

It was nice enjoying it with them – they found a few bugs that they needed to check out, and noticed some beautiful white geese near the lake.  The few turtles that were resting along the lake headed for the deepest part as soon as they heard us coming!

IMG_5628

All in all, even though we didn’t do anything extraordinary. we all agreed we had a good time – and to seal the deal Papa took us all out to lunch!  Back at home, Josh and I played pirates – I was Izzy!!   And Caroline drew a picture for me of our trek around the park, with a treasure at the end of the trail.  Notice at the top, it says, “Nana I heart you” – Awwwwww!!!!   I love them all so much!!!

IMG_5629

Hope the rest of the week goes as well………….

Have a great weekend, and if you are spending it with your grandkids, I hope you’ll have some special adventures together as well!  Take care all,


Linda

Fleece Tied & Knotted Doggie Pillow

I’ve been busy the last couple weeks prepping for a vendor sale at a local dog groomers (Helga’s Pet Grooming Plus is celebrating its 30th anniversary this Sunday, April 14, at its location at 7870 Culebra Road, San Antonio)

I wanted to make sure that I had some doggie-related items for sale, as well as our signature blankets and aprons from She & Me Designs (the Etsy store my daughter-in-law Stacy and I have). So, I got started on some table-fillers, such as key rings with doggie pics, coasters with doggie pics, aprons with doggie pics, AND fleece doggie beds.

IMG_5598 IMG_5597

I thought I’d share a few quick pictures and some ideas about how to make them – super easy to do, and your doggie will love them! And, best yet, you can make them in any size so perfect for the littlest and biggest dogs!!

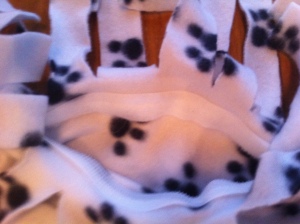
I started with one yard of doggie-inspired paw-print fleece fabric; measuring 58″ wide x 36″ long.

I cut along the fold, so the sewing size is 29″ x 36″. The doggie pillow can either be sewed in either a rectangle or oval shape. I wanted the pillows to have the tied-knot finish around the entire edge, so I sewed about 5″ inside the edge ALL the way around EXCEPT for a 6-8″ gap along one long edge. I double-stitched the seam in order to make sure it would hold up to doggie-pawing all over it!

Now, in order to keep the stuffing from falling out, I sewed a 6-8″ piece of Velcro in the gap. I actually tried it several ways; neither of which was ‘simple’, but the end result was great.

  • The first pillow I made, I sewed the Velcro in AFTER I sewed the seam all the way around. This was kind of tricky because I only had a small gap to work in, and to get the sewing machine foot to fit in the gap. BE CAREFUL not to sew the top and bottom of the VELCRO in together 🙂
  • The second pillow I made, I sewed the Velcro in BEFORE I sewed the seam!  A little trickier because the two pieces of fabric were loose and I had to make sure they were sewed in precisely so that the two pieces of Velcro lined up.  After they were sewed though it was much better, because then sewing the seam around was very easy!
Velcro opening

Velcro opening

After the Velcro is in and the seams are sewed, then it’s time to cut the 1″ strips around the doggie bed.  I’m including a link to a tutorial in case you haven’t made a tied-knot quilt (or doggie bed) before.

  • If you make a rectangular bed, then you’ll probably need to cut a 5″ square out of each corner, and then cut the strips.
  • If you make an oval bed, then you’ll cut strips all the way around, but you’ll need to do some creative cutting around the corners. In order to ‘make the corner’  you’ll need to cut the strips wider at the bottom and narrower at the top.   Be careful, but it does work.
Hand-cut 1" knotted ties

Hand-cut 1″ knotted ties

Note – be sure you don’t tie the knots in front of the Velcro until you’ve stuffed the pillow!

I am fortunate because I have an electric scissors that I  used to cut all the strips.  It is a My-T-Fine cordless scissors (available at JoAnn’s Fabrics), and I must say, it works my-t-fine for cutting fleece and most everything else!!!

After all that is said and done, it’s time to stuff the pillow.  I used Poly-Fil, which is available at all fabric / craft stores, as well as Wal-Mart and probably dozens of other stores as well!  However, you could also use cedar chips, as well as plastic bags (my daughter-in-law’s suggestion)!  Because of the Velcro opening you can replace the stuffing whenever necessary!

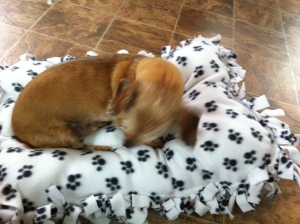
So, that’s how I made the doggie pillows!  They turned out great, and Boris (our wonder dog!) sure loves them too!

IMG_5594 IMG_5592 IMG_5591IMG_5595

That’s how I’ve spent my last couple of weeks – making doggie stuff – and I’ve had a good time at it too!!!   So, how have you spent your time lately?  Anything fun?

Have a great, great week,

Linda