Over the last 30+ years or so I’ve refinished a table here and there, but haven’t ever bothered to learn all the intricacies of refinishing furniture properly. I’ve always thought it was something I’d like to do a lot of, maybe even do it on a consignment basis. BUT, after working on a small project over the last couple weeks I learned (1) that it’s very fullfilling, but (2) I’m not really very good at it!
My daughter is moving into an apartment, and of course as all moms do, I tried to think of anything I could do to help her out. Buying old furniture and redoing it seemed like a great idea. The old light bulb was just clicking away at the possibilities!
She and I have very different tastes – I like mission style furniture (simple lines), and she tends to like ‘old world’ looking furniture. We found a perfect ‘first piece’ at the Community Thrift Shop in San Antonio – a pretty-beat-up end table or bedside table. Heavy dark wood with an ‘old world’ look to it. The piece was priced to sell at about $11.50 with a senior discount!


So far so good! We got the piece, now for the supplies!Daughter chose her colors. She is by no means a traditionalist when it comes to color! She loves color so she chose three colors for the small chest of drawers. A dark purple (Glidden ‘Black Tulip’) for the table top and sides, a lighter purple (Glidden “Fresh Grape Juice’) for the drawer fronts, and dark gray (Glidden ‘Stormy Night’) for the accent around each drawer.
I started with what seemed like a heavy sanding, using husband’s power sander. I had to change out the sand paper several times, but seemed like I really got it smooth.


After wiping off the dust, I primed it with Glidden white primer, waited for it to dry, and then started on the base coat. It took three coats to get a good finish on it.

with the primer

Base coat (dark purple)
As soon as I got all that finished I started on the drawers. I painted those the lighter purple, three coats each. Although I didn’t avoid the inset accent area, I did try to keep as much paint off it as possible After the drawers dried completely (more than 24 hours) – I taped off around the accent area in order to paint that dark gray
.
I know that television ads show the painting tape coming off perfectly – no paint leakage underneath, no marks, etc. Well, not so much for me! So, I took a little extra time with a fine-tipped brush and some paint and cleaned up the edges.
I let the entire table dry another full day before I applied three coats of Min-Wax over the entire painted area, letting it dry well between each coat. I also used some steel wool to smooth out bumps inbetween coats.
Next, we went to Hobby Lobby and purchased a handle and two knobs for the little chest of drawers. Hobby Lobby has a great selection of unusual and unique hardware, so it was fun to peruse for awhile. And, it’s always 50% off!. And yes, we noticed after we put the hardware in that it looks suspiciously like a happy face! A really cute one!

Hobby Lobby Hardware
All in all the project went well, but there are definitely some things I will do differently next time –
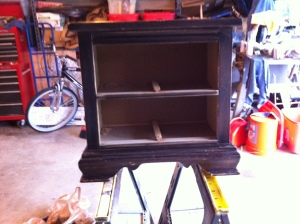
 1. I’ll take a lot more time in the preparation stage, sanding splintery edges, etc. I’ll also try to fill in with wood glue any gouges in the
  wood. I really thought the sanding I did was sufficient, but as you’ll see from my pictures, I should have prepped more! (See picture at right.)
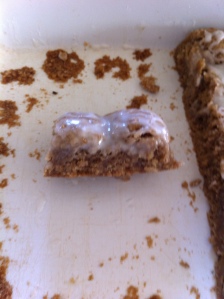
2. I’ll take a lot more care with the clear finish coat. I noticed after the third coat that there was a build up around the edges of the table. I’ll need to research how to spread it evenly – if you have any suggestions I’d really appreciate it? Do you use special brushes? How do you keep it from streaking? (See picture at left.)
Here’s the finished project – our daughter loves it, and I enjoyed making it for her!
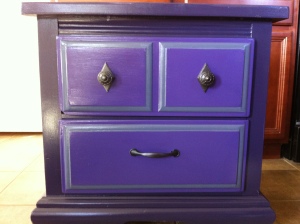
FINISHED!!